Set Up Email in Thunderbird
Instructions given below will guide you through setting up email in Thunderbird, a free email client software.
Once you first launch Thunderbird, you will get a pop up window to put your name, email address and email account password.
If you are setting up a second account just go to
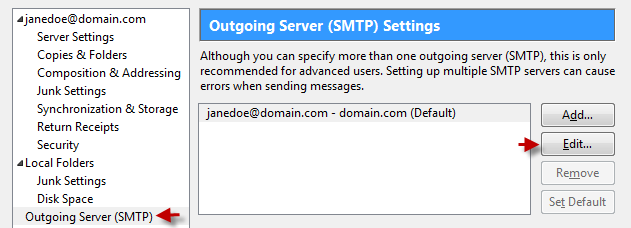
Tools > Accounts settings
On the very bottom of the window you will see Account Actions button.
Click it and choose Add new account from the drop down list.
Click ‘Continue’ for Thunderbird to fetch email settings automatically.
However we’ll need to edit automatic settings.
- Make sure that you have full email address as username (including @domain.com)
- Port numbers must be
POP3: 110
IMAP: 143
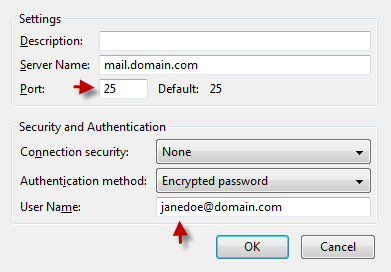
SMTP: 25 or 26
- Incoming and Outgoing Mail server: domain.com
- No http://www. must be used; mail. prefix can be omitted
- Choose POP3 if you want to download emails to your computer
- Choose IMAP if you want them to stay on the server
Hit Re-test Configuration or proceed to manual setup
It is recommended to check Incoming Mail Server settings
And Outgoing Mail Server settings
Authentication should be set to password; username must be full email address (including @domain.com). Port number: 25 or 26.
Was this article helpful?


