Email Setup on an iPhone
This article will show how to set up email sending and receiving on your iPhone.
The infrastructure behind WebHostingBuzz services is set to assure that emails will work perfectly well on iPhones and other mobile clients.
Add Email account
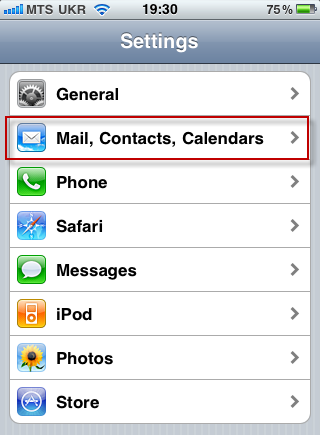
Go to Settings > Mail, Contacts, Calendars
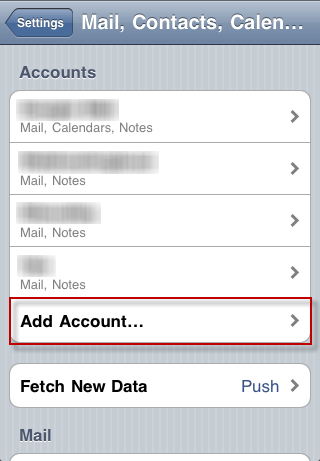
Tap Add Account:
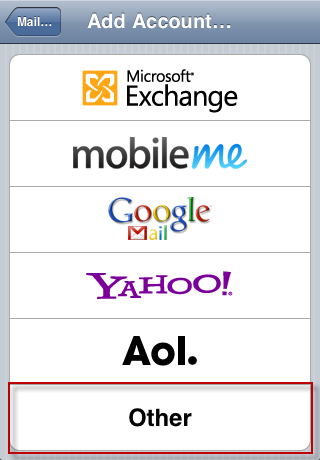
Choose Other:
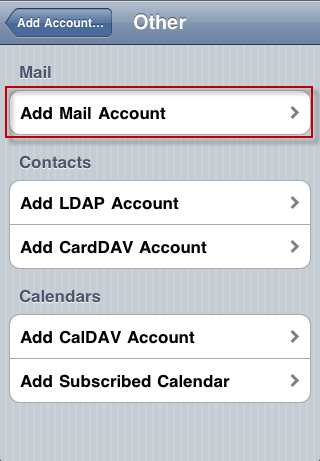
Choose Add Mail Account:
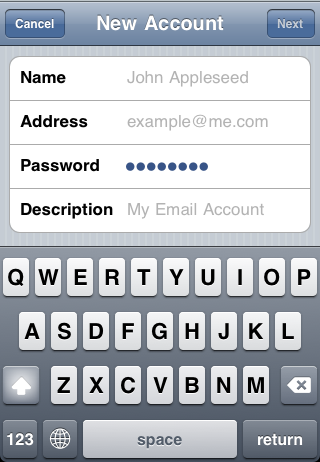
Account settings
Fill in the fields as follows:
- Name: your name;
- Address: your email address (with @domain.com);
- Password: the password for outgoing/incoming servers (make sure you enter the correct password, as specified in cPanel > Email Accounts);
- Description: a short description that will help to distinguish between your accounts.
When done, click Next:
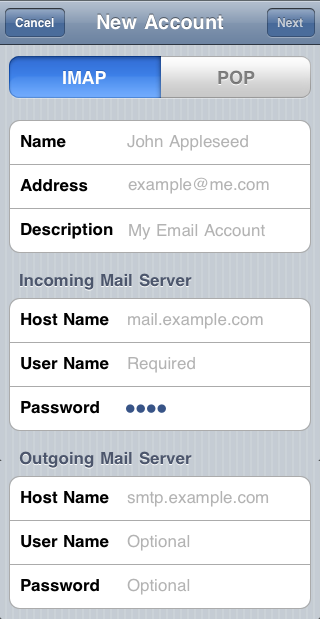
Choose either IMAP or POP and fill out the fields as following:
- Name: your name;
- Address: your email address (with @domain.com);
- Description:a short description that will help to distinguish between your accounts.
Incoming mail server
- Host Name: put your domain name here;
- User Name: full email account username as specified in cPanel >> Email Accounts (e.g. [email protected]);
- Password: the account password as specified in cPanel >> Email Accounts.
Outgoing mail server
- Host Name: put your domain name here;
- User Name: full email account username as specified in cPanel >> Email Accounts (e.g. [email protected]);
- Password: the account password as specified in cPanel >> Email Accounts
Make sure to fill all the fields under Incoming/Outgoing Mail Server.
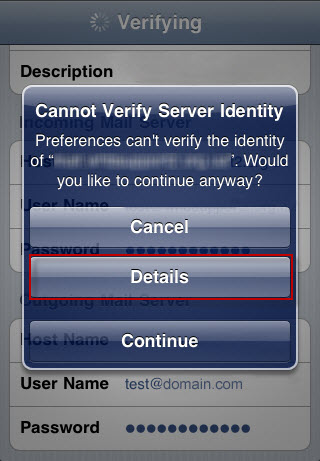
You will see the following notification:
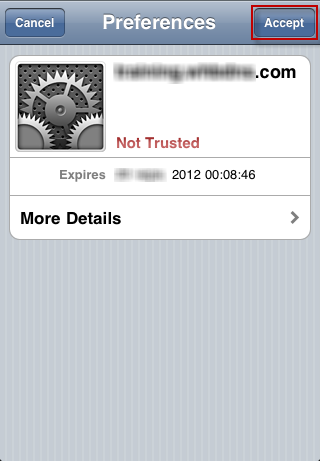
Tap Details. You should see the following screen:
Press Accept.
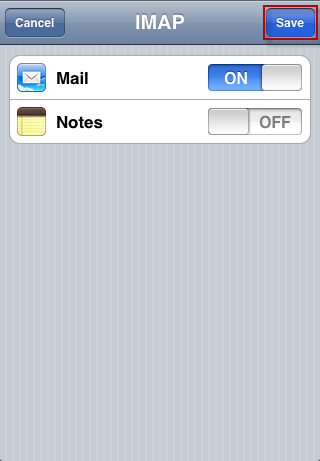
You will then be offered to choose the entries to be synchronized. You can just press Save.
After this your new account is ready to use from the Mail app.
If you are having trouble using email with the default settings, please check ‘Advanced’ settings
Advanced settings
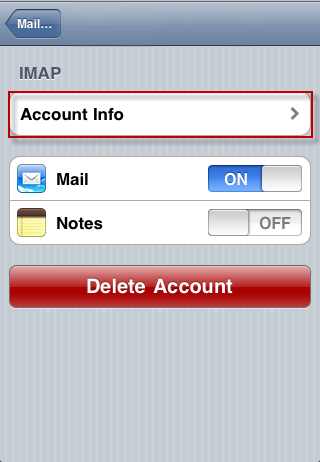
Go to:
Settings > Mail, Contacts, Calendars > Account Info
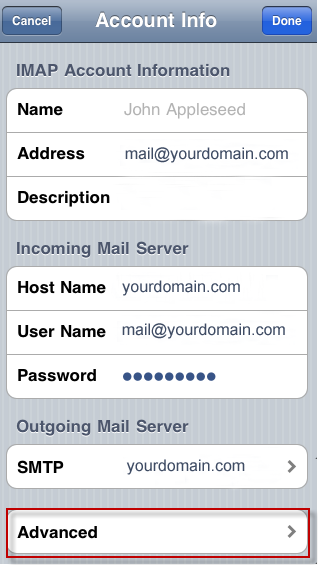
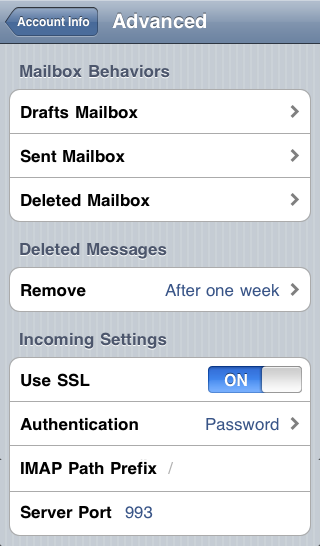
In order to configure your incoming server, press Advanced:
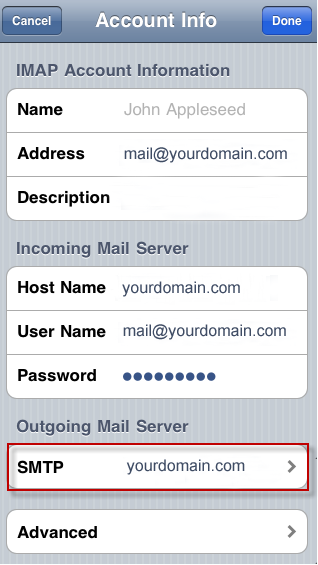
You will see the following screen where you need to press SMTP:
Please make sure that:
- Authentication is set to Password.
- SSL is set to OFF, port number is 143
- POP: 110, IMAP: 143, SSL: OFF
If you are having issues with receiving mail when using SSL, please try disabling it (remembering to change the server port accordingly) and try checking again.
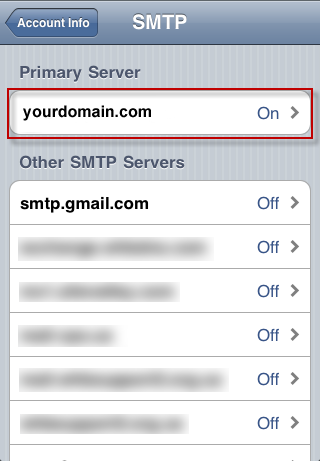
- Tap on the outgoing mail server:
You will see the list of all your outgoing servers.
- Choose the primary one (it should be your domain name):
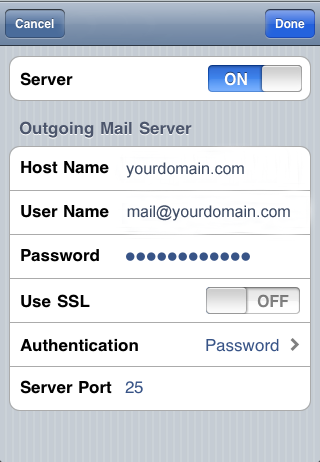
You will see the following screen:
Please make sure that:
- The login credentials are correct and ‘Authentication’ is set to ‘Password’
- SSL is set to OFF
- The port specified is 25 in ‘Server Port’ section
- If you still have troubles sending email through this port, try putting in 26 instead, as ISP often block port 25 for their internal reasons.
Press Done when you’re finished.
Was this article helpful?

